Showing posts with label recipe. Show all posts

Monday, 26 March 2012

Pumpkin Muffins


In recent visits home to the states I have had pumpkin lattes, pumpkin cheesecake, pumpkin (filter)coffee, pumpkin spice Hershey Kisses, pumpkin preserve on toast, pumpkin ice cream, and of course pumpkin pie. The delicious list of pumpkin related foods grows every time I visit, yet many Brits I know have not had the chance to try pumpkin flavoured anything.   

Thankfully Fenwicks Food Hall here in Newcastle seemingly has a love of American foods. They always seem to stock those odd American treats such as Marshmallow Fluff, Reese’s Peanut Butter Cups, Pop Tarts, Lucky Charms cereal, Bisquick Pancake Mix and all variations of Jelly Belly jelly beans.  Since they are imported items these normally reasonably priced sugary delights cost a ridiculous amount over here.  
However much it may cost, I am just thankful to be able to purchase a can of Libby’s Pumpkin to bake some of my favourite pumpkin flavoured treats. These Pumpkin muffins have been well received by both friends and colleagues who have taste tested them, so they remain on my list of favourite recipes.

They are uniquely flavoured but not offensive although I think it is difficult to describe them to someone who has never had pumpkin.  I will say that they taste best still warm slathered with cream cheese accompanying a cup of coffee but are equally delicious for afternoon tea with a cuppa (and don’t forget to make sure your pinky finger daintily points up).
Whatever the flavour you really can’t go wrong with homemade muffins.
Pumpkin Muffins
(from Muffins Fast and Fantastic, Third Edition 2001 by Susan Reimer)

Makes 10-12 standard-size

9oz(255g) plain flour (with self-raising flour, omit baking powder: do not adjust bicarbonate of soda)
1 tsp (5ml) baking powder
1 tsp (5ml bicarbonate of soda
½ tsp (2.5ml) salt
1 tsp (5ml) ground cinnamon
½ tsp (2.5ml) each of ground ginger, nutmeg, and cloves
4-6oz (110-170g) fine white granulated sugar
1 egg
4-5 fl oz (120-150ml) milk or water
2 TBSP (30ml) honey
Half of a 425g tin of pumpkin – that is, 7 fl oz (200ml) the remainder can be frozen in an airtight container
3 fl oz(90ml) vegetable oil or 3 oz(85g) butter, melted
2-3 oz (60-85g) chopped walnuts or raisins

Prepare muffin tins. Preheat oven to 375-400 F (190 -200 C) for a conventional oven, Gas Mark 5-6.

In a large bowl, sift together: flour, baking powder, bicarbonate of soda, salt, spices and sugar.

In a separate bowl, beat egg with a fork. Add milk/water, honey, pumpkin and oil/melted butter. Stir well.

Pour all of liquid mixture into dry. Stir just until combined and no dry flour is visible. Add walnuts/raisins during the final strokes.

Spoon batter into tins. Bake for 15-20 minutes, until tops spring back when pressed gently.

Sunday, 4 March 2012

Pancakes for Brunch

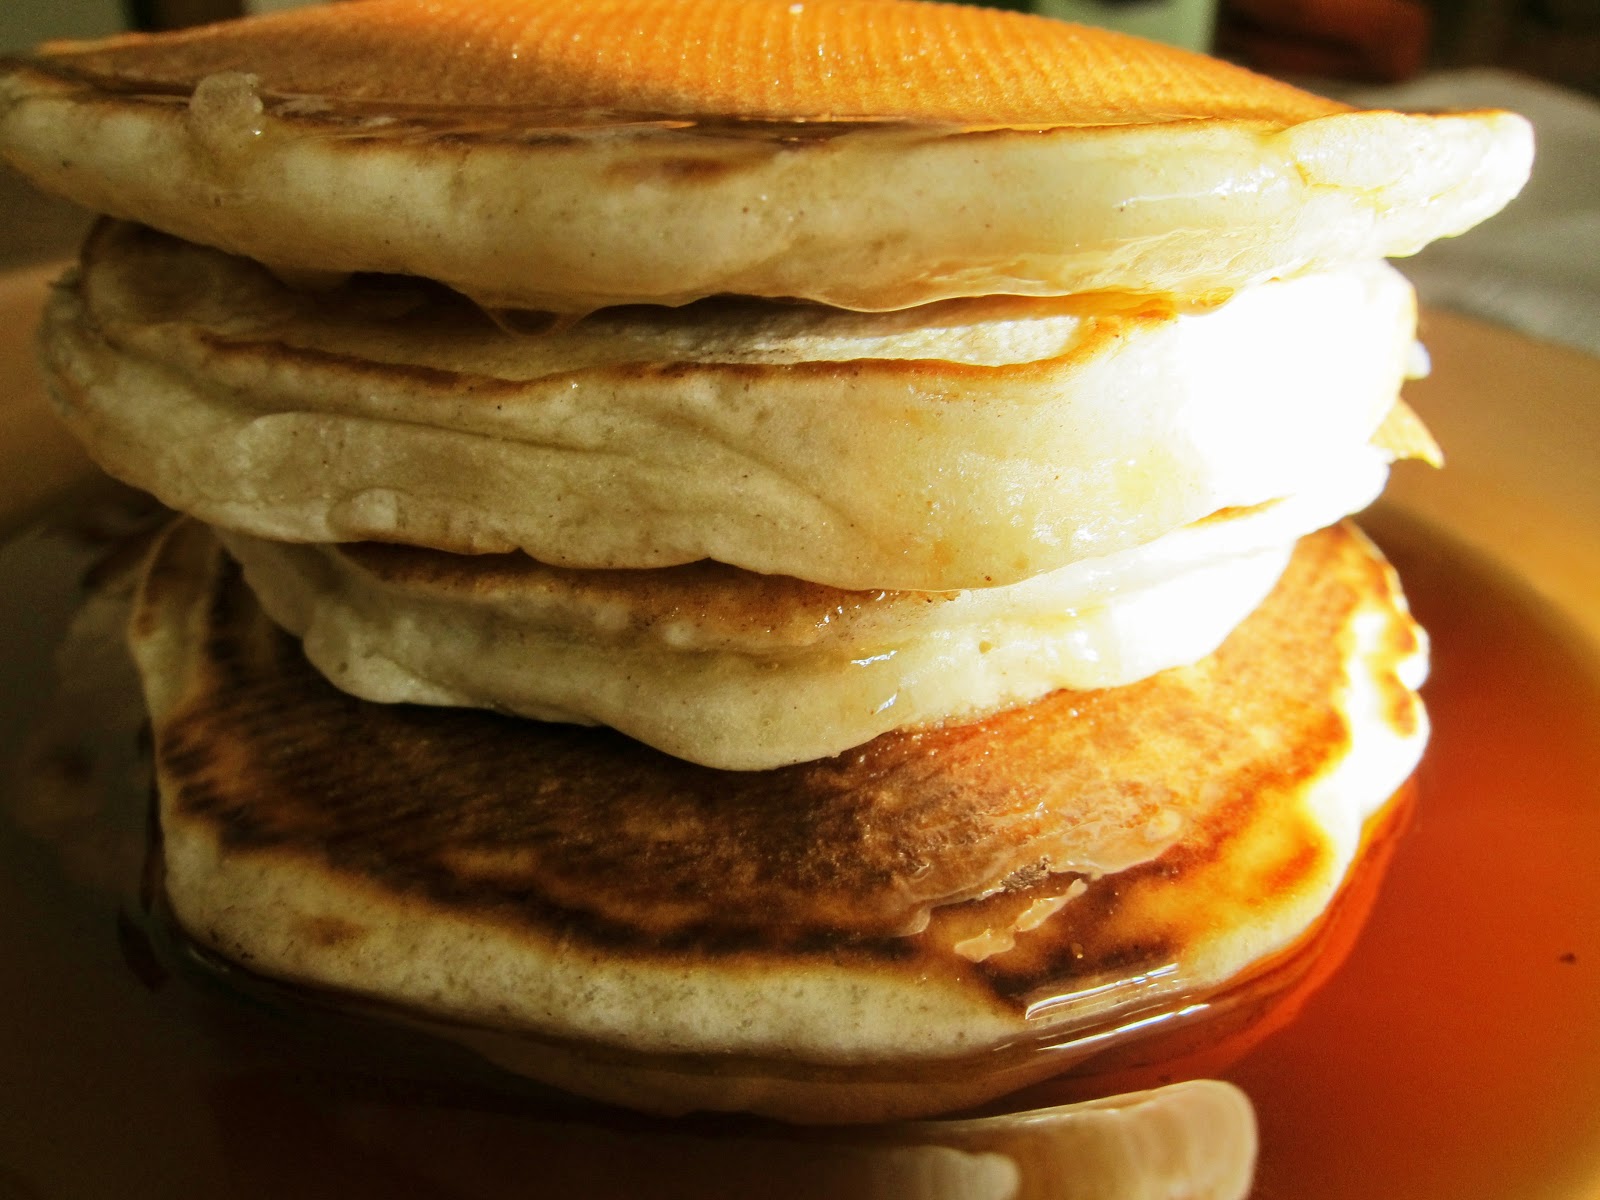
A Sunday morning spent making thick American-style pancakes to smother in maple syrup and enjoy for brunch is my kind of weekend morning. 
Throw in a glass of fruit juice and share it all with loved ones and you’ve created the winning combination of great food & great company.   
It’s not difficult to achieve since pancakes are pretty straight forward to make.
All you need is the simple ingredients put together in the correct quantities and combined with the right technique.
I’ve included links to two simple recipes below for reference.
The main difference is that American pancakes use a thicker batter than their British counterpart (which is more like a crepe then the cakey American-style pancake, in my humble opinion).
I love the fact that each recipe uses similar ingredients but produces a completely different result.
Whichever type of pancakes you prefer, why not go ahead and make yourself some this weekend?

British Pancake recipe: http://www.bbc.co.uk/food/recipes/basicpancakeswithsuga_66226

Wednesday, 30 November 2011

Thanksgiving

Thanksgiving is one of those unique holidays which most Americans look forward to and which we try our best never to take for granted. 

It is a holiday revolving around being thankful for what we have, being surrounded by family and close friends, and not a single gift is exchanged(except maybe a hostess gift or two).


I am always so grateful when I am able to spend it back home with my family and this year is one of those special years. 

I haven't yet graduated to being the main cook on Thanksgiving (what a scary thought that is!) but I like to contribute something to the table.  

As a member of the family who enjoys baking (and there are quite a few of us) I decided to make a dessert and in my eyes there are two main Thanksgiving desserts: Pumpkin Pie and Pecan Pie.  

One of these traditional desserts was already spoken for but no one had baking rights to the Pecan Pie yet, so I was quick to claim it.

I envisioned little individual pecan pies, a muffin-sized pie to be exact (I'm slightly obsessed with muffins) the perfect portion that no one can say no to really.

So I set about finding a recipe that I could mutate.  I found a recipe for Mini Pecan Pies on the Myrecipe.com web page which was from Southern Living magazine November 2008. 

The recipe used a package of frozen tart shells which I decided could easily be substituted with my clever unbaked pie crust plan.

Long story short, I followed the Southern Living recipe for the pie filling and created my own little plan for the crusts.

My dad supervised as I hesitantly put the muffin pan with the half-baked crusts filled with delicious pecan goo into the oven and 25 minutes later.....voila!

Here is the recipe, which I've slightly adapted, from Southern Living November 2008:

Mini Pecan Pies (adapted from Southern Living NOVEMBER 2008)

Ingredients

  • 3 cups chopped pecans
  • 3/4 cup sugar
  • 3/4 cup dark corn syrup
  • 3 large eggs, lightly beaten
  • 2 tablespoons melted butter
  • 1 teaspoon vanilla extract
  • 1/8 teaspoon salt
  • two unbaked, ready rolled pie crusts
  • some flour for sprinkling on the crusts
You will need: muffin tins totalling at least a dozen

1. Preheat oven to 350ºF. Bake pecans in a single layer in a shallow pan 8 to 10 minutes or until toasted and fragrant.

2. Unroll the crusts. Dust some flour on both sides of each pie crust. Using a wine glass turned upside down as a rough estimate cut rounds out of the crusts.  I was able to get 7 or 8 from each crust, although I did get creative and have to mush together the scraps and re-roll them to get the last round. 

3.  Push the rounds gently into the muffin tin, being careful not to put any holes through the dough as you press them in, the edges may overlap or be somewhat wrinkled as it is pressed into the tin but this is OK. Bake in the oven (without the filling) for roughly 10 minutes at 350ºF just to part bake but keep watch so it doesn't burn.
4. Stir together sugar and corn syrup in a medium bowl. Stir in pecans, eggs, and next 3 ingredients.
5. Spoon roughly a TBSP of pecan mixture into each crust. Ensure there is a good amount of the liquid in each and not just pecans since the liquid is what binds the filling together.

6. Place muffin tin with filled individual crusts into the middle rack of the oven.
7. Bake at 350ºF for 25 to 30 minutes or until set.

8. Remove to wire racks, and let cool completely (about 30 minutes). Store in an airtight container for up to 3 days.


Monday, 24 October 2011

Sugar Cookies

The sugar cookie is such a simple and versatile cookie. 


Perfectly delicious on its own or it can be made extra special using cookie cutters. Once decorated they can be a special treat suitable for any tea party!

I decided to make these particular sugar cookies for a Tea Party themed Baby Shower. 

I had chosen the teacup and teapot cookie cutters specifically for this purpose and I’m sure I will get plenty of use out of them in future too (Tea Party themed cookies from now on!).

I have to admit that it was a little frustrating when the baked cookies came out of the oven looking less than ideal. 


They had spread out quite a bit and were not particularly looking like they were heading to a tea party but luckily I was planning to add icing touches to embellish the finished cookie.

My mission was to force the brain to assume they were destined for a tea party through the creative use of sugar and an icing pen.


I had made an impulse buy of an icing pen (for the bargain price of only £3.99) on a little lunch time excursion to Clas Ohlson. I’m loving it and have put it to good use with these cookies.  


I am already envisioning Christmas cookies with sprinkles and icing galore!

Recipe from Joy of Baking:

Makes about 36 cookies.

3 cups (390 grams) all purpose flour
1/2 teaspoon salt
1 teaspoon baking soda
1 cup (227 grams) unsalted butter, room temperature
1 cup (200 grams) granulated white sugar
2 large eggs
2 teaspoons pure vanilla extract
In a separate bowl whisk together the flour, salt, and baking soda. 

In the bowl of your electric mixer (or with a hand mixer), beat the butter and sugar until light and fluffy (about 3 minutes). 

Add the eggs and vanilla extract and beat until combined.

Add the flour mixture and beat until you have a smooth dough. Divide the dough in half and wrap each half in plastic wrap. Refrigerate for about one hour or until firm enough to roll.

Preheat oven to 350 degrees F (177 degrees C) and place rack in center of oven. Line two baking sheets with parchment paper. 

Remove one half of the chilled dough from the refrigerator and, on a lightly floured surface, roll out the dough to a thickness of 1/4 inch (1 cm). Keep turning the dough as you roll, making sure the dough does not stick to the counter.  Cut out desired shapes using a lightly floured cookie cutter and transfer cookies to baking sheet.

Place the baking sheets with the unbaked cookies in the refrigerator for about 15 minutes to chill the dough which prevents the cookies from spreading and losing their shape while baking.

Note: If you are not going to frost the baked cookies, you can sprinkle the unbaked cookies with sparkling sugar. 

Bake cookies for about 8-10 minutes (depending on size) or until the edges are just starting to brown. Remove from oven and let cookies cool on baking sheet for a few minutes before transferring to a wire rack to finish cooling.

Frosted cookies will keep several days in an airtight container. Store between layers of parchment paper or wax paper.

Saturday, 1 October 2011

French Toast Casserole

It may be purely an American thing to make a casserole that is not savoury but whatever you choose to name this dish it is not a disappointment for something special of a sweet & stodgy nature.

It is probably best to refer to the meal where this dish is served as brunch otherwise you are flat out having dessert for breakfast. Don’t get me wrong, I’m not opposed to the idea of having dessert for breakfast, and in fact some of my favourite breakfasts are probably considered desserts somewhere in the world (waffles smothered with syrup, bagels with fruity cream cheese, porridge with dried fruit and drizzles of honey...) but for the sake of appearing healthy let’s just refer to this as the perfect brunch dish.

My mom found this recipe a couple of years ago and prepared it for our family Christmas Brunch that year (see how that sounds? Brunch is just fantastic!).

Simply put, it was awesome. It is now in my ever-growing repertoire of tried & tested recipes.

Basically it is a giant finger-licking portion of delicious French Toast (or Eggy Bread as it is called in the UK) that has been smothered in a sticky combination of syrup, pecans and brown sugar.  It is then baked to perfection so each bite has a bit of crunch followed by the soft sweet insides.

It is pretty simple to assemble and well worth a try! Your sweet tooth will definitely thank you (even if your waistline wants to disown you).

Below is the original recipe that my mom typed out for me from the newspaper article where she discovered it.  The article credited the recipe as being adapted from Virginia Willis' Bon Appetit, Y'all.

It is worth noting that recently I made a half batch (since I didn’t have a football team to serve it to) in a brownie pan and it worked quite well and made two large portions or 4 petite ones.

French Toast Casserole (makes 8 servings)
  
4 TBSP (1/2 stick) unsalted butter, melted
3/4 cup firmly packed light brown sugar
1 loaf brioche (any sweetish white bread will do) sliced roughly 1 1/2 inches thick
8 large eggs, lightly beaten
1 cup whole milk
1 TBSP vanilla extract
1/2 TSP ground cinnamon
1/4 TSP ground ginger
Pinch Salt
1/2 cup chopped pecans or walnuts
Confectioners Sugar
Maple syrup

Combine melted butter and brown sugar in a 9x13 inch baking dish.

Arrange bread slices overlapping in the dish.

In a large bowl, whisk together eggs, milk, vanilla, cinnamon, ginger and salt. 

Pour mixture over bread, and let it soak in. 

Top bread slices evenly with pecans or walnuts.

Cover with plastic wrap, and refrigerate for 3 to 12 hours.

Preheat oven to 350 degrees. Meantime, take casserole out of refrigerator and let sit at room temp for 20 minutes.

Bake casserole until browned and set, 30 to 45 mins. Let cool slightly on wire rack.

Sift confectioners’ sugar over casserole, and serve with syrup.

(Adapted from Virginia Willis' Bon Appetit, Y'all)

Tuesday, 13 September 2011

Cinnamon Pull-Apart Bread

Deliciously sticky & sweet, this hodge-podge of cinnamon sugary layers can only be described as seriously satisfying especially straight out of the oven.  

As soon as I saw this recipe on Brown Eyed Baker’s blog I knew that I definitely had to find the time to make it, but that thought was only second to my drooling.

This is my kind of bread and is the perfect accompaniment to a cup of freshly brewed coffee on a lazy Sunday.  

It took me a full afternoon to patiently prepare my kitchen so that everything would come together nicely. I carefully removed any traces of cats from the work area and banned them from the kitchen for the duration (which I think they were none too pleased about).

I scrubbed the counter top and laid out my tools (rolling pin, mixing bowl, measuring spoons, etc...) followed by each ingredient lined up in the proper order. 

My mom has always maintained that she thoroughly enjoys baking bread from scratch mainly because she loves the kneading process.  I have to admit that I’m not a huge fan of kneading since it makes my hands ache a bit, but luckily this bread only requires the dough be deflated and kneaded only a little bit (you have no idea what fun it is to punch...sorry “deflate” dough until you’ve had a go). 

The finished result is pretty darn impressive looking and tasting, which is definitely a winning combination.  Even though the process may have made my kitchen look like the losing end of a flour fight followed by a cinnamon sugar explosion, it was worth every sticky sweet moment!

Tuesday, 6 September 2011

Chocolate Guinness Cake

(This entry was originally posted on my non-food blog but I wanted to repost it on here especially since Sylvia's Chocolate Guinness Cake has become a bit of an institution at our office bake sales.....she has developed quite a reputation for her baking skills, Delia and Nigella best watch out!)

Cake. Delicious cake. Need I say more?
Well, yes I should probably say more, especially to explain the details about these glorious chocolaty creations.

My office is known for its impressive charity bake sales which means some members of the office (and even those who have moved on to other offices but still participate, lucky us!) have amazingly awesome baking skills. These skills are often honed over the years by testing new recipes on unsuspecting colleagues.


For example, one might come into the office to start their work week thinking it was just another manic Monday. Low and behold, out of the corner of your eye, you notice there are some baked goodies housed in tupperware perched on a desk. Soon, an email goes around announcing that someone has been practicing their cake-making skills and bonding with their trusty and beloved oven over the weekend. Thankfully they have thought to bring in the results to share with the rest of us.


A stampede of office workers with plates at the ready usually ensues. This is then followed by the sweet smell of chocolate or other deliciously fragrant sugary concoctions wafting across the room as the items are dished out. Mumbled jumbled yum’s and other feedback can be heard as mouths are stuffed with the baked goodies. Just as quickly as they arrived, everyone returns to their desk satisfied and just a little bit hyper.


Sylvia made these two particular treats, and my gosh they were a hit! Chocolate Guinness Cake(from the Hummingbird Cake days cookbook) & Chocolate Brownies.

The brownies were picture perfect and baked ‘just right’ in true brownie style. They were a little bit gooey on the inside with a bit of crunch on the outside. And that cake was one of the most moist, rich, chocolaty cakes I have ever eaten. It even had been dusted with coco powder, the flavor of which compliments the cake perfectly. It was incredibly delicious and memorable.

The Hummingbird Bakery's Guinness Chocolate Cake Recipe can be found in their Cake Days cookbook or on Stylist.co.uk's webpage here: http://www.stylist.co.uk/life/recipes/chocolate-guinness-cake 

Saturday, 27 August 2011

Easy Mac and Cheese Muffins

Brits and Americans seem to have very different taste when it comes to certain dishes.

I always get funny looks and raised eyebrows from Brits when the idea of  brunch consisting of maple syrup on pancakes and sausage comes up. And on the flip side, if you try to explain to an American that Brits mainly eat pancakes (which would actually be called crepes if we were on the continent) with lemon & sugar for their dinner on Pancake Day, they think it’s pretty odd.

So as you can imagine it can be a bit of a challenge to find common ‘taste bud’ ground on dishes that seemingly have the same ingredients but are in fact very different.

Enough of the pancake talk though, this is actually a post about a certain deliciously stodgy comfort food which thankfully seems to span the two cultures quite well from my tiny experience.

The superstar comfort food combo of pasta, cheese, and butter, fondly known as Mac & Cheese.  It is a warm & fuzzy edible hug that sticks to your ribs and makes you need a little nap when eaten in large quantities. 

I was very pleased to find that this dish was readily available on both sides of the pond and the differences between the two were not that apparent, if there are any at all. 

Although one American boxed version is practically flourescent orange in colour which doesn’t seem natural, and it doesn't seem to be popular in the UK but in its defence, it is easy to make and in a pinch it does the trick.

There is no argument that homemade Macaroni and Cheese is best and it has a firm footing on my list of favourite things to eat. It is also a welcome dish for most taste buds(unless you are on a diet).  

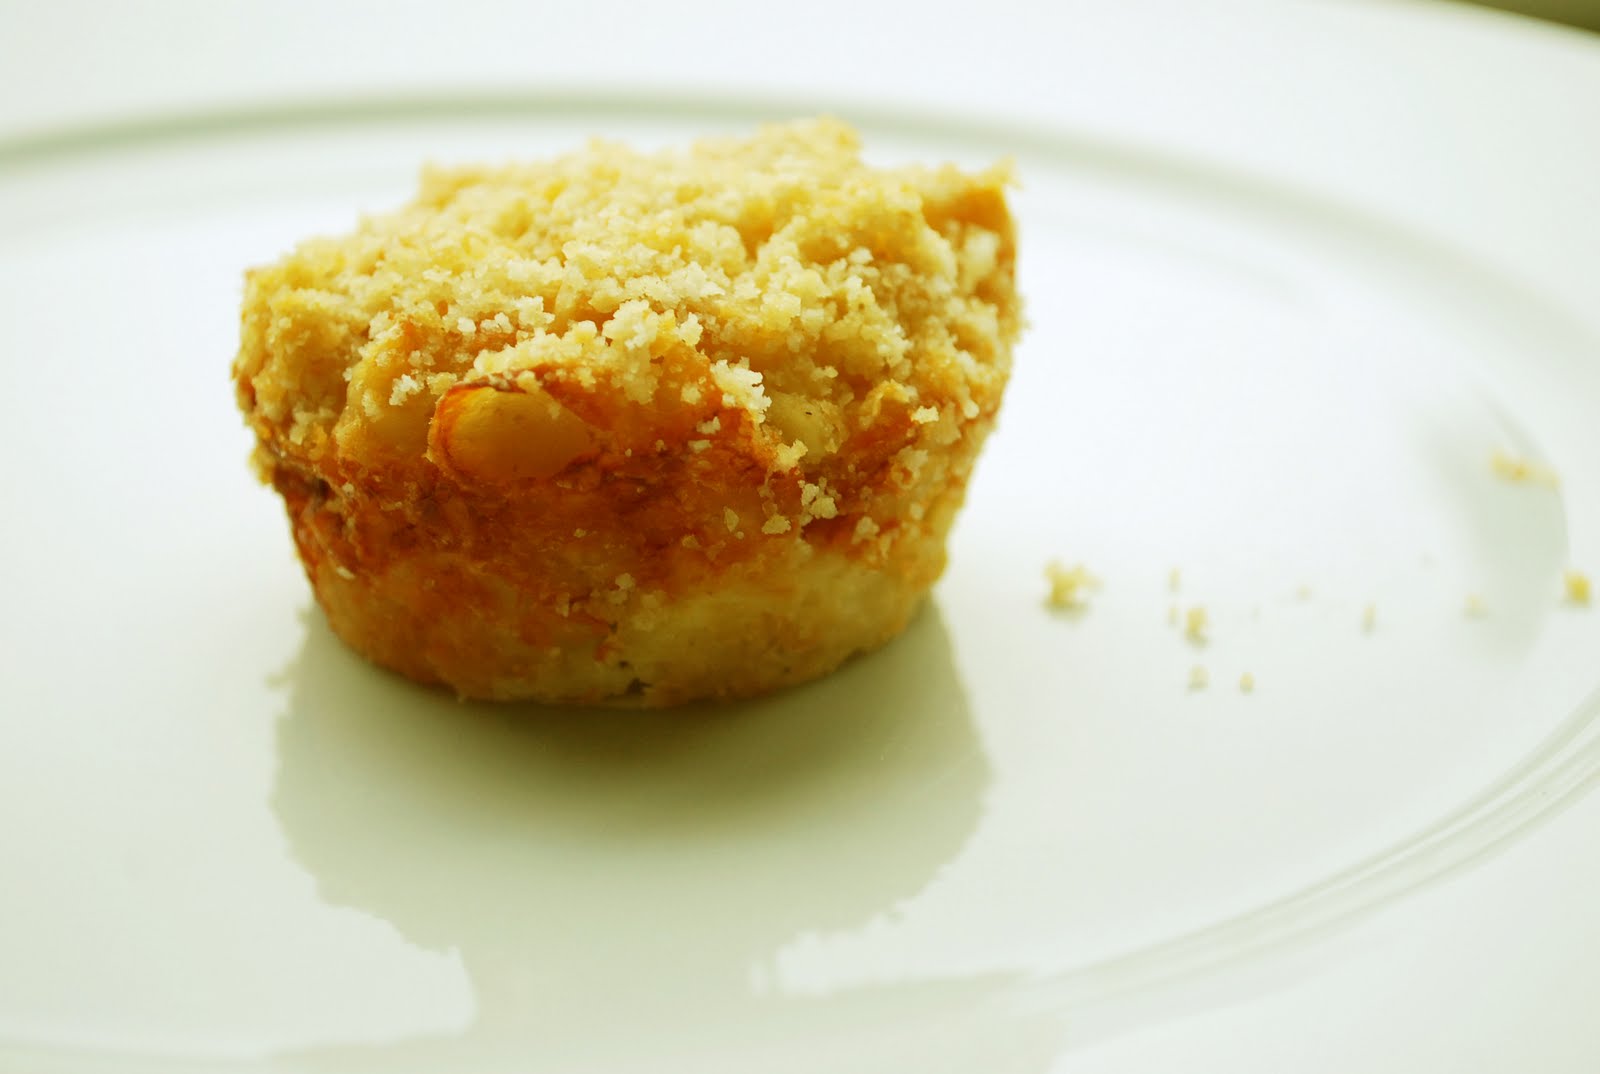
So of course when my friend gave me a copy of this recipe I was rather curious.  The title of Easy Mac and Cheese Muffins brought images to mind of a bready muffin with tubes of macaroni sticking out in all directions with some crusty melted cheese dotted on top. 

Luckily that isn’t actually how this recipe works. In fact, it is a recipe for individual portions of comforting and delicious Macaroni and Cheese baked to perfection using muffin tins (hence the ‘muffin’ title).  

How ingenious is that?

Wednesday, 17 August 2011

Fig Bar Bread (Muffins)

There are some recipes that are well loved family traditions.

The recipes are made routinely for special occasions (Christmas, b-days, out of town visitors) or any excuse for good eatin’ (how about just because it’s Tuesday?).  

They have come to represent comfort, enjoyment and quality time with loved ones all combined perfectly in mouth-watering deliciousness.

It’s fascinating how each family has its own unique set of food traditions and I’m pretty excited to share one of my family’s secret recipes which I absolutely love, and yes, I did ask my Mom first if it was OK.

Technically, this recipe is not so secret since it originally came from a magazine or newspaper way back when, and the name of said magazine or paper has been lost over time.  The point is that it was someone else’s recipe, perhaps even a family tradition which was shared with hopes of spreading the edible joy.

The recipe itself has been photocopied many, many times over the years and is ready to completely fall to pieces, but it is well worth saving.

My copy of the recipe was given to me by my Mom with her own little notes of improvement scribbled on it.  I have now added my own scribbles each time I’ve made it (and for the record, her loaves always taste so much better than mine for some reason!). 

Unfortunately, I haven’t mastered the art of changing an American recipe to UK measurements, and therefore this recipe is still pretty Americanised except for the obvious changes (ie: fig bar = fig roll).  I just hope this fact is not off putting and I hope that my UK friends are still willing to try making it.

Fig Bar Bread muffin & mini loaf slice

Fig Bar Bread
(makes one average loaf)

Batter:
1 ½ cups of sifted all-purpose(plain) flour
2/3 cup granulated sugar
1 ½ tsp baking powder
½ tsp salt
2 beaten eggs
½ cup milk(4 fluid oz)
1/3 cup cooking oil (just under 3 fluid oz)
½ tsp vanilla

Streusel:
1/3 cup brown sugar
½ tsp ground cinnamon
2 Tablespoons butter or margarine
6 or 7 fig bars(fig rolls), crumbled, roughly 1 cup
(I always use a LOT more crumbled fig bars since i LOVE the streusel and prefer a LOT more then this recipe creates)

Into a medium bowl, sift together the flour, sugar, baking powder and salt.

Combine the beaten eggs, milk, oil and vanilla; add to flour mixture, stirring till well blended.

In a small bowl, combine brown sugar and cinnamon; cut in butter or margarine till mixture resembles coarse crumbs.  Mix in the crumbled fig bars(fig rolls).

Pour one-third of the batter into a greased and floured loaf pan.

Sprinkle half the fig mixture over batter; pour another one-third of the batter into the pan and sprinkle remaining crumbs over. Top with the remaining batter. With a narrow spatula, swirl gently through the batter and crumbs to create a marble effect.  

(I prefer to leave a layer of the streusel on top rather than covering it with batter, but this is up to you)

Bake in 350 F oven for 50-55 minutes or till the loaf tests done. Let it stand in the pan for 5 minutes; remove from pan.

Cool completely on a rack.  Cut loaf into thin slices; serve with butter or whipped cream cheese.

(thin slices, eh? Pffft! Cut it into extra thick slabs, no question.)


Recently, I made a double batch of Fig Bar Bread, which created enough batter for one large sized loaf, two mini loaves and a handful of muffins which promptly fell to pieces when I impatiently cut them in half while they were still warm so that I could photograph them. Falling to bits or not, they were eaten straight away and tasted just like I remember...and giving me the strong urge to call my Mom.


Saturday, 13 August 2011

Charity Bake Sale - DEC East Africa Crisis Appeal

Our Charity Bake Sale
In my place of work we have built quite a reputation for our ability to raise money for charity purely through the power of baking.  

We have worked hard to nurture this reputation over the years and this week’s Charity Bake Sale was certainly no exception. 


There were delicious goodies a plenty!
Near: Stained Glass Jello
Far: Guinness Chocolate Cake

The beautiful buffet of treats consisted of both homemade and shop bought deliciousness all spread out on tables in one corner of our office with colleagues from across departments tempted by our efforts coming and going throughout the day.

Let me tell you, it is incredibly difficult to resist trying one of everything or just digging in and eating it all when it’s right in front of you all day.

The sweet and savoury dishes sat side by side, with delicately constructed desserts nudging up against their sturdier savoury counterpart.  A plate baked Steak Pie and a lattice topped Spinach Pie alongside the Blueberry Lemon Millefeuille and Coffee Kisses. 
Left: Coffee Kisses
Right: Cinnamon Apple Muffins


I have to admit that the Coffee Kisses are one of my all time favourite bake sale treats and I love it when they make an appearance at our Bake Sales.

The recipe comes from the Bero cookbook and they are incredibly more-ish.

They go especially well with a mug of coffee or cup of tea, well heck, technically they are great even with a glass of water! 

I’m not ashamed to say that my mouth is watering now whilst just gazing at the photo of them, mmm...

Blueberry Lemon Millefeuille

All my drooling aside, I’m very pleased to confirm that we raised a whopping £247 in aid of the DEC’s East Africa Crisis Appeal.

It really warms my heart that I am lucky enough to work with such wonderfully generous and giving people, thank you to everyone for making it such a success!

Wednesday, 10 August 2011

Mussels Provencal

Mussels are one of those foods that can be a bit scary to try for the first time. I managed to avoid officially trying them for a very long time. 

It was only when a certain someone, who absolutely loves mussels, gently nudged me to overcome my fear of the unknown seafood and give ‘em a go.  

Let me tell you, I am so glad he was so persistent on the issue because they are absolutely divine!

Plus the fact that this certain someone really enjoys cooking them as you can see from these photos (yay!) and doesn’t seem to mind going solo on the de-bearding/scrubbing process that goes along with it (yuck!).  

Long may these delicious edible epiphanies continue!

I’ve been told that the following link is for the recipe which was used: http://www.ehow.com/how_4611881_mussels-garlic-white-wine-sauce.html

Friday, 5 August 2011

Cauliflower Stilton Soup

When you think about summertime, it isn’t traditionally the time of year when you would choose to have a thick & warming soup for your dinner. However, if you live in England it could well be on the menu and you’d be grateful for that fact.  
A steaming bowl of delicious soup served with crusty brown bread on the side is just what you want after a drizzly morning or a chilly afternoon.  

It’s even more of a treat when the soup is made for you to enjoy by someone else!

This recipe was adapted from the Easy Cauliflower Soup recipe found on the Waitrose recipes page.  It is pretty simple and gets points for frugality too since it uses items already in the average store cupboard.


Cauliflower Stilton Soup
1 tbsp olive oil
1 small onion, chopped
2 cloves garlic, chopped
1 fresh bay leaf
1 large potato, peeled and diced
1 large cauliflower, cut into florets
3 tbsp greek yoghurt
250g Stilton

In a large saucepan, heat the oil and gently cook the onion and garlic for 3-4 minutes until softened. Add the bay leaf and 1½ litres of cold water, then the potato and cauliflower. Bring to the boil then simmer gently for 15-20 minutes until the vegetables are just tender.

Remove the bay leaf then purée the soup using a hand blender or a liquidiser until smooth. Pour back into the pan, add the yoghurt and crumble in the Stilton. Heat through gently to melt the cheese then season generously with freshly ground black pepper.